Why You’ll Love No-Bake Date Bars
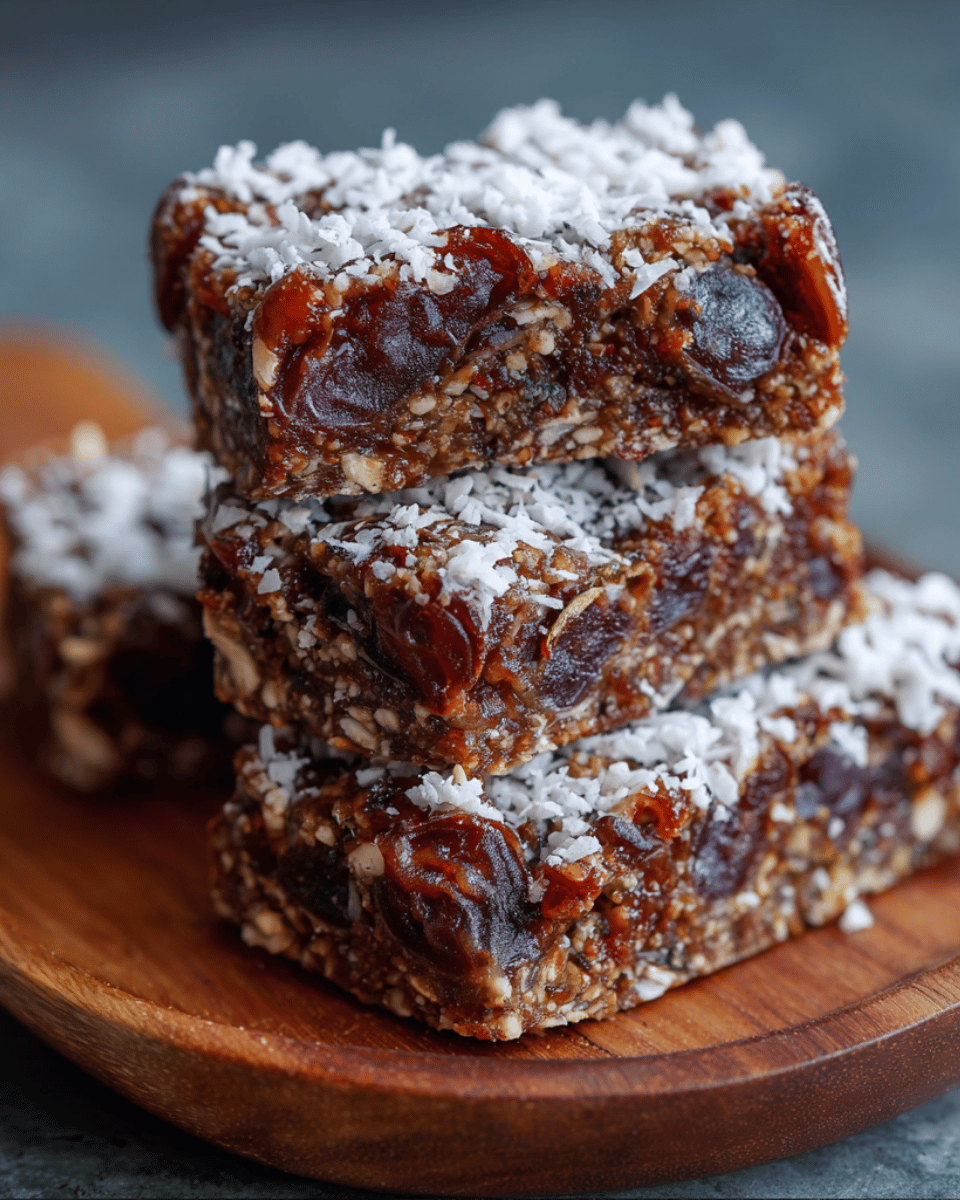
If you’re searching for a healthy snack that’s both delicious and easy to prepare, no-bake date bars will quickly become your favorite. These bars are soft, chewy, and naturally sweet, thanks to Medjool dates. Best of all, they don’t require baking, which means you can make them in minutes without turning on the oven.

They’re also versatile. You can enjoy them as:
- A quick breakfast when you’re rushing out the door.
- A pre- or post-workout snack to fuel your body.
- A lunchbox treat that’s both kid-approved and parent-approved.
- A dessert alternative when you’re craving something sweet yet wholesome.
Unlike most store-bought snack bars that are packed with refined sugar, these bars use only natural sweeteners and whole-food ingredients. If you’ve enjoyed snacks like homemade granola bars or energy bites, you’ll love this recipe even more for its simplicity and nutrition.
Preparation Phase & Tools to Use
Essential Tools and Equipment
To make perfect no-bake date bars, you’ll need just a few basic kitchen tools:
- Food processor – Breaks down sticky dates into a smooth, binding paste.
- Mixing bowl – Useful if you want to stir in ingredients by hand after processing.
- Spatula – Helps spread and press the mixture evenly without sticking.
- 8×8 inch baking pan – Shapes the mixture into firm, sliceable bars.
- Parchment paper – Prevents sticking and makes removing the bars simple.
Importance of Each Tool
Each tool plays a role in the recipe’s success:
- The food processor is essential—dates need a powerful blend to create the sticky base.
- The pan ensures even thickness, so your bars hold together.
- The parchment paper guarantees a clean lift, avoiding messy crumbles.
Preparation Tips
Before you begin, keep these expert tips in mind:
- Use fresh, soft Medjool dates. If your dates feel dry or hard, soak them in warm water for 10 minutes, then drain well.
- Lightly toast the nuts (almonds or walnuts) for a richer, nuttier flavor.
- Always press the mixture firmly into the pan to prevent bars from falling apart.
- Chill the bars for at least 1–2 hours to achieve the perfect firm, chewy texture.
Ingredients for No-Bake Date Bars
Here’s the ingredient list, kept simple and wholesome:
- 2 cups Medjool dates, pitted
- 1 ½ cups rolled oats
- ½ cup almonds (or walnuts)
- ¼ cup shredded coconut (optional)
- 2 tbsp honey or maple syrup
- 1 tsp vanilla extract
- Pinch of salt
Ingredient Notes:
- Dates provide natural sweetness and act as the binding ingredient.
- Oats add texture, fiber, and a hearty feel.
- Nuts bring healthy fats and crunch.
- Coconut adds tropical flavor but is optional.
- Honey or maple syrup enhances sweetness and stickiness.
- Vanilla extract gives warmth and depth.
- Salt balances sweetness and highlights flavors.
Step-by-Step Directions
Follow these steps for chewy, perfectly shaped bars:
- Blend the dates
- Place pitted Medjool dates into a food processor.
- Blend until smooth, sticky, and paste-like.
- Add the dry ingredients
- Add rolled oats, nuts, coconut (optional), honey, vanilla, and salt.
- Process again until the mixture sticks together.
- Shape the bars
- Line an 8×8 inch pan with parchment paper.
- Transfer the mixture into the pan.
- Use a spatula to press it down firmly and evenly.
- Refrigerate
- Chill for 1–2 hours until the mixture sets.
- Slice and store
- Lift the mixture out using parchment paper.
- Slice into bars or squares.
- Store in an airtight container in the fridge.
Tips & Variations
Dessert twist: Drizzle melted dark chocolate on top before chilling.
For chocolate lovers: Mix in 2 tbsp of cocoa powder for chocolate date bars.
Nut alternatives: Swap almonds for pecans, cashews, or even pumpkin seeds.
Vegan option: Replace honey with maple syrup.
Extra protein: Add 1–2 tbsp of chia seeds or flaxseeds.
Serving Suggestions
No-bake date bars are versatile and can be enjoyed throughout the day. Their chewy texture, natural sweetness, and nutty flavor make them an excellent fit for many occasions. Here are some creative ways to serve them:
- Quick Breakfast: Pair a bar with almond milk, coffee, or tea for an energizing start to your day.
- Lunchbox Snack: Wrap individual bars in parchment paper for a healthy, portable treat.
- Workout Fuel: Eat before or after exercise for a boost of natural energy.
- Afternoon Pick-Me-Up: Enjoy with a latte or iced coffee during work breaks.
- Healthy Dessert: Serve chilled with a drizzle of melted dark chocolate.
- Travel Snack: Pack them in a reusable container for long trips, hikes, or road snacks.
For more healthy snack inspiration, check out no-bake peanut butter balls, another great on-the-go recipe.
Common Mistakes to Avoid & How to Perfect the Recipe
Even though no-bake date bars are simple to make, a few common mistakes can affect texture and taste. Here’s how to avoid them:
- Using dry dates
- Mistake: Hard or dry dates won’t blend smoothly.
- Fix: Soak them in warm water for 10 minutes, then drain before processing.
- Not pressing mixture firmly enough
- Mistake: Loose packing causes crumbly bars.
- Fix: Use a spatula or flat-bottomed glass to press the mixture tightly into the pan.
- Skipping refrigeration
- Mistake: Bars won’t hold shape and will fall apart when sliced.
- Fix: Always chill for at least 1–2 hours before cutting.
- Over-processing oats
- Mistake: Grinding oats too much results in a dough-like mixture.
- Fix: Pulse lightly to keep some texture.
- Over-sweetening
- Mistake: Adding too much honey or maple syrup makes bars sticky.
- Fix: Stick to the recommended 2 tablespoons or adjust slightly.
By avoiding these mistakes, you’ll get perfectly chewy and firm no-bake date bars every time.
Side Dish Recommendations
Although delicious on their own, no-bake date bars pair beautifully with other foods and drinks. Here are eight side dish ideas:
1. Fresh Fruit Salad
A mix of berries, apples, and citrus adds refreshing juiciness to balance the dense bars.
2. Yogurt Parfait
Layer no-bake date bars with Greek yogurt, granola, and berries for a protein-packed breakfast.
3. Smoothies
Blend a banana almond smoothie or green smoothie and enjoy alongside the bars for a filling meal.
4. Herbal Tea
Green tea, peppermint, or chamomile complements the sweetness of the bars.
5. Nut Butter Dip
Serve with almond butter or peanut butter for extra protein and richness.
6. Dark Chocolate Squares
Pair with high-quality dark chocolate for a decadent yet balanced treat.
7. Cheese Board
Contrast the sweetness with mild cheeses like brie or cream cheese. Add grapes for balance.
8. Iced Coffee or Latte
The natural sweetness of dates pairs perfectly with chilled coffee drinks.
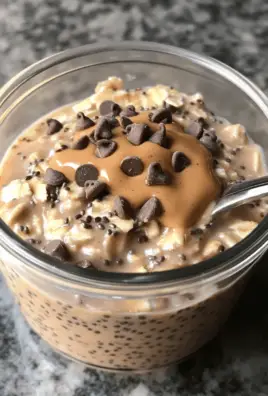
For more pairing ideas, you may also enjoy chia pudding recipes, which make an excellent breakfast alongside these bars.
Recipe Tips, Storage, and Reheating Instructions
Making no-bake date bars is easy, but these pro tips will help you perfect the recipe:
- Consistency matters: If the mixture feels too dry, add 1–2 extra dates or a drizzle of honey/maple syrup.
- Texture boost: Keep some oats and nuts slightly chunky for a better bite.
- Flavor variation: Add cinnamon, nutmeg, or cocoa powder for unique twists.
Storage
- Refrigerator: Store in an airtight container for up to 10 days.
- Freezer: Wrap bars individually in parchment paper, place in a freezer-safe bag, and store for up to 3 months.
Reheating
- These bars are designed to be eaten cold or at room temperature. They don’t need reheating.
- If frozen, let them thaw at room temperature for about 15–20 minutes before eating.
Pro tip: For meal prep, make a double batch, freeze half, and keep the rest chilled for the week.
FAQs About No-Bake Date Bars
Here are answers to the most common questions people ask:
1. Are no-bake date bars healthy?
Yes! They are naturally sweetened with Medjool dates, rich in fiber, and full of nutrients from oats and nuts.
2. Can I make them nut-free?
Absolutely. Replace nuts with pumpkin seeds or sunflower seeds for a nut-free option.
3. How do I make them vegan?
Swap honey with maple syrup or agave nectar for a 100% vegan version.
4. Can I use quick oats instead of rolled oats?
Yes, but rolled oats give a chewier texture and better structure.
5. Why are my bars crumbly?
This usually happens if you didn’t press the mixture firmly enough or if the dates weren’t soft and sticky.
6. Can I add protein powder?
Yes. Add 1 scoop of protein powder, but increase liquid (maple syrup or a splash of almond milk) to balance dryness.
7. Do kids like no-bake date bars?
Definitely. They’re naturally sweet and chewy, making them a healthy snack kids will enjoy.
For more healthy snack ideas, check out energy bites and oatmeal cookies.
Conclusion
No-bake date bars are the perfect balance of health and flavor. They’re quick to prepare, require no baking, and use only a handful of wholesome ingredients. Whether you’re making them for meal prep, a quick snack, or a lunchbox treat, these bars will become a household favorite.
The best part? You can easily customize them with nuts, seeds, chocolate, or spices to fit your taste. Once you try them, you’ll never go back to processed snack bars.
Call to Action (CTA)
Ready to make your own batch of no-bake date bars? Gather your ingredients, follow the step-by-step guide, and enjoy a naturally sweet, nutrient-packed snack.
👉 If you loved this recipe, explore other wholesome ideas like chia pudding recipes and no-bake peanut butter balls for more no-bake inspiration.
Don’t forget to share this recipe with friends and family who love healthy snacking!
PrintNo-Bake Date Bars: The Perfect Healthy Snack
- Total Time: 1 hour 30 minutes
- Yield: 12 bars 1x
Description
Chewy, naturally sweet, and so easy — these No-Bake Date Bars pack Medjool dates, oats, and nuts into a wholesome snack. No oven, no fuss — just chill, slice, and enjoy! Perfect for lunchboxes, pre-workout fuel, or a better-for-you dessert.
Ingredients
2 cups Medjool dates, pitted
1 1/2 cups rolled oats
1/2 cup almonds (or walnuts)
1/4 cup shredded coconut (optional)
2 tbsp honey or maple syrup
1 tsp vanilla extract
Pinch of salt
Instructions
1. In a food processor, blend dates until smooth and sticky.
2. Add oats, nuts, coconut (optional), honey or maple syrup, vanilla, and salt. Pulse until the mixture holds together when pressed.
3. Line an 8×8 inch pan with parchment paper. Press the mixture firmly and evenly into the pan.
4. Refrigerate for 1–2 hours until set and firm.
5. Lift out, slice into bars or squares, and store in an airtight container in the fridge.
Notes
• Use fresh, soft Medjool dates. If dry, soak in warm water for 10 minutes, then drain well.
• For vegan bars, use maple syrup instead of honey.
• Boosts: add 1–2 tbsp chia seeds, flaxseed meal, or 2 tbsp cocoa powder for a chocolate twist.
• Storage: refrigerate up to 10 days, or freeze up to 3 months (wrap individually).
• Press mixture very firmly to prevent crumbly bars.
- Prep Time: 10 minutes
- Cook Time: 0 minutes
- Category: Snack
- Method: No-Bake
- Cuisine: American
Nutrition
- Serving Size: 1 bar
- Calories: 175 kcal
- Sugar: 22 g
- Sodium: 5 mg
- Fat: 4.8 g
- Saturated Fat: 0.6 g
- Carbohydrates: 32 g
- Fiber: 4 g
- Protein: 3.5 g


Leave a Comment