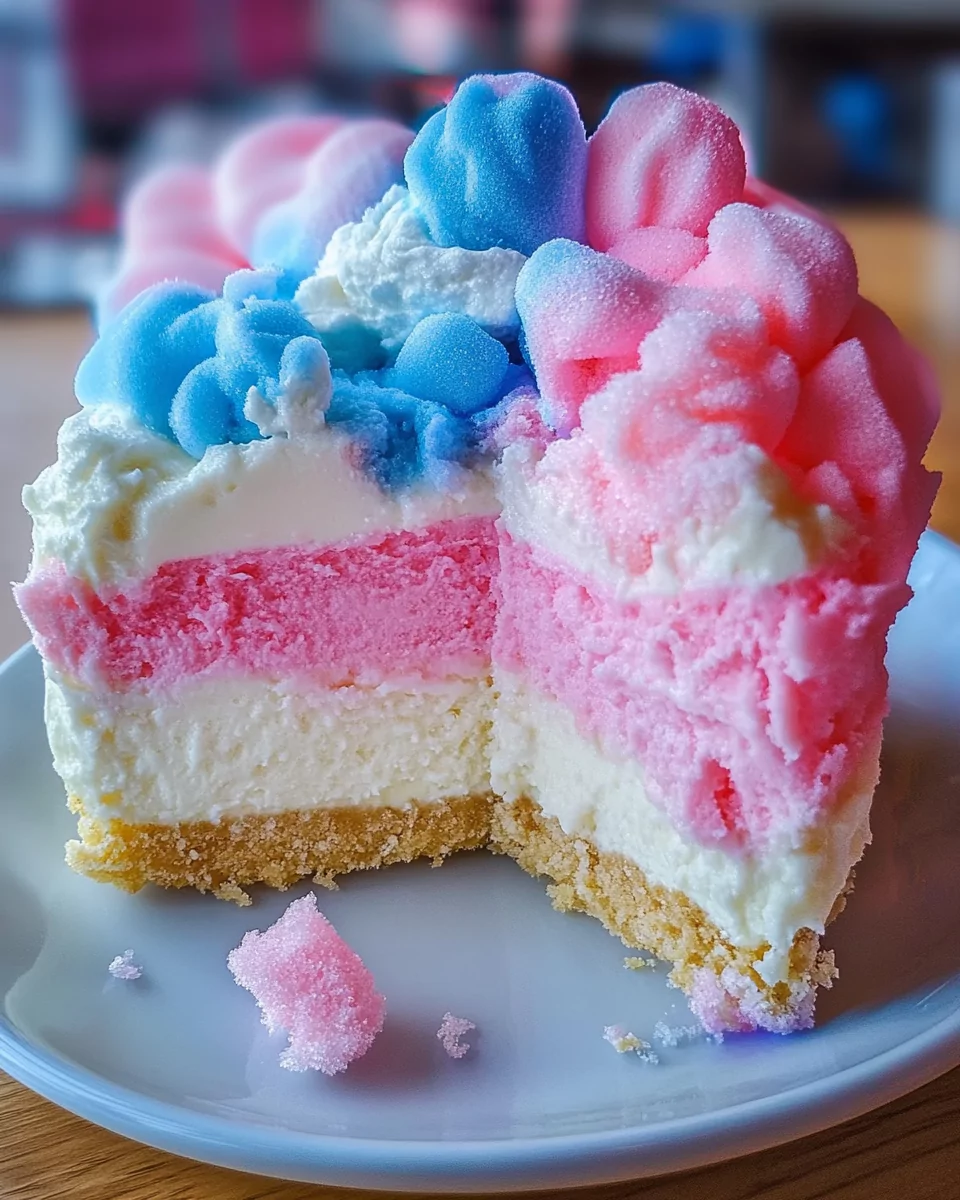
This Cotton Candy Cheesecake is a dream dessert for anyone who adores a touch of whimsy. It combines the velvety richness of a classic cheesecake with the playful sweetness of cotton candy. Perfect for birthdays, parties, or just because, this cheesecake is sure to wow your guests with its fun colors and nostalgic flavors.
Why You’ll Love This Recipe
- Unique Flavor: The cotton candy flavor adds a playful twist to the traditional cheesecake.
- Versatile Uses: Ideal for celebrations or as a show-stopping dessert centerpiece.
- Customizable: Use colorful cotton candy pieces to match party themes.
Preparation Phase and Tools to Use
Essential Tools and Equipment
- Springform pan (9-inch) – Ensures easy removal for a flawless presentation.
- Hand or stand mixer – For achieving a smooth, creamy filling.
- Mixing bowls – Multiple sizes for prepping crust, filling, and topping.
- Spatula – For spreading and smoothing layers.
- Measuring cups and spoons – Ensures accurate ingredient proportions.
- Baking sheet – Optional but useful for catching any drips during baking.
Importance of Each Tool
Each tool plays a crucial role in crafting a cheesecake with perfect texture and flavor. Using the right equipment ensures an even bake, smooth filling, and effortless assembly.
Preparation Tips
- Room-Temperature Ingredients: Allow cream cheese, eggs, and sour cream to reach room temperature for easier blending and a lump-free batter.
- Avoid Overmixing: Incorporate ingredients just until combined to prevent cracks during baking.
- Grease the Pan: Lightly grease the springform pan to make serving and cleanup easier.
Ingredients
For the Crust:
- 1 ½ cups graham cracker crumbs
- ¼ cup granulated sugar
- ½ cup unsalted butter, melted
For the Cheesecake Filling:
- 4 (8 oz each) blocks cream cheese, softened
- 1 cup granulated sugar
- 1 cup sour cream
- ¼ cup all-purpose flour
- 4 large eggs
- 1 teaspoon vanilla extract
- ½ cup cotton candy, torn into small pieces
For the Whipped Topping:
- ½ cup heavy cream
- 2 tablespoons powdered sugar
For Garnish:
- Additional cotton candy
Step-by-Step Directions
1. Prepare the Crust
- Preheat the oven to 325°F (163°C).
- In a medium-sized bowl, combine graham cracker crumbs, granulated sugar, and melted butter. Stir until the mixture resembles wet sand.
- Press the crust mixture firmly into the bottom of a 9-inch springform pan. Use the bottom of a glass for even compression.
- Bake for 10 minutes. Set aside to cool completely.
2. Make the Cheesecake Filling
- In a large bowl, beat the cream cheese with a hand or stand mixer until smooth and fluffy.
- Gradually add the granulated sugar, mixing until fully incorporated.
- Add the sour cream and flour. Mix on low speed until the batter is smooth.
- Add the eggs one at a time, blending well after each addition. Avoid overmixing to maintain a creamy consistency.
- Stir in the vanilla extract and gently fold in the cotton candy pieces for a burst of color and sweetness.
3. Bake the Cheesecake
- Pour the filling over the cooled crust, smoothing the top with a spatula.
- Place the pan in the preheated oven and bake for 60-70 minutes. The center should be set but still slightly jiggly.
- Turn off the oven and prop the door open slightly. Leave the cheesecake inside to cool gradually for 1 hour.
- Once cooled, refrigerate the cheesecake for at least 4 hours or overnight to allow it to fully set.
4. Prepare the Whipped Topping
- In a chilled mixing bowl, whip the heavy cream and powdered sugar until stiff peaks form.
- Spread or pipe the whipped topping evenly over the top of the cheesecake.
5. Garnish and Serve
- Add a whimsical touch by decorating the cheesecake with additional cotton candy just before serving.
- Slice into 12 servings and enjoy this delightful dessert with friends and family!
Quick Notes
- Cotton Candy Tips: Use a variety of colors for a visually stunning dessert.
- Storage: Refrigerate the cheesecake without cotton candy garnish, as it will dissolve over time. Add the garnish right before serving.
- Serving Temperature: Let the cheesecake sit at room temperature for 10-15 minutes before slicing to enhance its creamy texture.
Serving Suggestions
This Cotton Candy Cheesecake is a dessert that deserves to shine. Whether it’s the centerpiece of a birthday celebration or a fun addition to a dessert table, serving it the right way makes all the difference.
How to Serve
- Room Temperature Sweetness: Allow the cheesecake to sit at room temperature for 10-15 minutes before serving. This enhances the creamy texture.
- Slice Like a Pro: Use a sharp knife dipped in warm water, wiping clean between slices for a professional presentation.
- Plating Options: Serve with a dollop of whipped cream, a sprinkle of edible glitter, or alongside colorful macarons for extra flair.
Common Mistakes to Avoid and How to Perfect the Recipe
Mistakes to Avoid
- Overmixing the Batter: Overmixing introduces air bubbles, which can cause cracks on the cheesecake’s surface.
- Skipping the Cooling Phase: Rushing the cooling process leads to a dense texture and cracks. Gradual cooling is key.
- Adding Cotton Candy Too Early: Cotton candy dissolves quickly when exposed to moisture. Always add it as a garnish just before serving.
How to Perfect the Recipe
- Use a Water Bath: Baking the cheesecake in a water bath (or placing a pan of water on the oven‘s lower rack) adds moisture to the oven and helps prevent cracking.
- Chill Thoroughly: Ensure the cheesecake is refrigerated for at least 4 hours, preferably overnight, for the best flavor and texture.
- Be Gentle with Cotton Candy: Fold the cotton candy into the filling delicately to keep its light, airy texture intact.
Side Dish Recommendations
Pairing this indulgent dessert with complementary sides can elevate your dining experience. Here are some options to round out your menu:
1. Fresh Berry Medley
A mix of strawberries, blueberries, and raspberries adds a tangy, refreshing contrast to the cheesecake’s sweetness.
2. Vanilla Bean Ice Cream
A scoop of creamy vanilla bean ice cream provides a cooling and mellow accompaniment.
3. Chocolate Drizzle
Drizzle melted dark or white chocolate over the cheesecake slices for added decadence.
4. Lemon Sorbet
The zesty tang of lemon sorbet offers a palate-cleansing complement to the rich cheesecake.
5. Mint-Infused Whipped Cream
Add a fresh twist with lightly mint-flavored whipped cream on the side.
6. Mini Macarons
Serve colorful macarons alongside the cheesecake for a themed, elegant touch.
7. Cotton Candy Martini
Pair with a whimsical cotton candy martini for a fun, adult-friendly twist.
8. Flavored Tea or Coffee
Offer a selection of teas (like fruity hibiscus) or flavored coffees to balance the sweetness.
Recipe Tips for Success
To ensure your Cotton Candy Cheesecake turns out perfectly every time, follow these pro tips:
- Prevent Cracks: Bake the cheesecake in a water bath or place a pan of water on the lower oven rack to keep the oven moist.
- Smooth Crust: Use the flat bottom of a glass or measuring cup to evenly press the crust mixture into the pan.
- Even Baking: Rotate the cheesecake halfway through baking for consistent results.
- Soft Cream Cheese: Ensure the cream cheese is fully softened before mixing to avoid lumps in the filling.
- Color Play: Use different cotton candy colors in the batter for a marbled effect, making each slice unique and eye-catching.
Storage and Reheating Instructions
Storing the Cheesecake
- Refrigerator: Store the cheesecake in an airtight container or wrap tightly with plastic wrap. It will stay fresh for up to 5 days.
- Freezer: For longer storage, wrap the cheesecake (without the cotton candy garnish) in plastic wrap and aluminum foil. Freeze for up to 3 months. Thaw in the refrigerator overnight before serving.
Reheating (Optional)
Cheesecake is best served cold or at room temperature. However, if you prefer a slightly warm slice:
- Microwave individual slices for 10-15 seconds. Be cautious not to melt the whipped topping or garnish.
FAQs
1. Can I use store-bought crust instead of making my own?
Yes! A pre-made graham cracker crust can save time, though a homemade crust provides better flavor and texture.
2. Can I add food coloring to the filling?
Absolutely! If you want to intensify the colors, use a drop or two of gel food coloring to match the cotton candy hues.
3. What’s the best way to prevent my cheesecake from cracking?
Avoid overmixing the batter, use a water bath during baking, and cool the cheesecake gradually in the oven before refrigerating.
4. Can I substitute the sour cream?
Yes, you can use plain Greek yogurt as a substitute for sour cream. The flavor and texture will be slightly different but still delicious.
5. How do I keep the cotton candy garnish from melting?
Add the cotton candy garnish right before serving. Store the cheesecake without it to maintain its fresh, fluffy texture.
6. Can I make this cheesecake gluten-free?
Use gluten-free graham crackers for the crust and ensure all other ingredients are certified gluten-free.
7. Can I use flavored cotton candy?
Yes! Flavored cotton candy can enhance the cheesecake’s taste. Just ensure the flavor pairs well with the cheesecake base.
8. How do I know if the cheesecake is done?
The edges should be set, and the center should jiggle slightly when the pan is gently shaken. It will firm up as it cools.
9. Can I make this recipe ahead of time?
Yes, this cheesecake is perfect for making a day or two in advance. Refrigerate until ready to serve.
10. What’s the best way to slice the cheesecake cleanly?
Use a sharp knife dipped in warm water, wiping it clean between slices for neat, professional cuts.
Conclusion
This Cotton Candy Cheesecake is more than just a dessert—it’s a delightful experience. With its creamy texture, playful flavor, and eye-catching presentation, it’s guaranteed to be a crowd-pleaser. By following the detailed steps, incorporating the tips, and serving with flair, you’ll create a dessert that’s as fun to make as it is to eat.
Enjoy bringing a touch of whimsy to your next celebration with this unforgettable cheesecake! 🎉
Cotton Candy Cheesecake
Ingredients
For the Crust:
- 1 1/2 cups graham cracker crumbs
- 1/4 cup granulated sugar
- 1/2 cup unsalted butter melted
For the Cheesecake Filling:
- 4 8 oz each blocks cream cheese, softened
- 1 cup granulated sugar
- 1 cup sour cream
- 1/4 cup all-purpose flour
- 4 large eggs
- 1 teaspoon vanilla extract
- 1/2 cup cotton candy torn into small pieces
For the Whipped Topping:
- 1/2 cup heavy cream
- 2 tablespoons powdered sugar
For Garnish:
- Additional cotton candy
Instructions
Prepare the Crust:
Make the Cheesecake Filling:
- In a large bowl, beat the softened cream cheese until smooth. Add the sugar and beat until fully combined.
- Mix in the sour cream and flour until the batter is smooth.
- Add the eggs one at a time, mixing well after each addition. Stir in the vanilla extract and cotton candy pieces.
Bake the Cheesecake:
- Pour the filling over the cooled crust and smooth the top.
- Bake in the preheated oven for 60-70 minutes, or until the center is set but still slightly jiggly.
- Turn off the oven, leaving the cheesecake inside with the door ajar. Allow it to cool for 1 hour.
- Refrigerate for at least 4 hours or overnight to fully set.
Prepare the Whipped Topping:
- In a mixing bowl, whip the heavy cream and powdered sugar until stiff peaks form.
- Spread or pipe the whipped cream over the cooled cheesecake.
Garnish and Serve:
- Just before serving, garnish the cheesecake with additional cotton candy for a fun, colorful touch.
Notes
Storage: Store the cheesecake in the refrigerator and add the cotton candy garnish just before serving to prevent it from melting.
Serving Tip: Allow the cheesecake to sit at room temperature for 10-15 minutes before serving for the best texture.




Leave a Comment